Creating a peer-to-peer/real-time/multiplayer application (MVP) using Node.js
Published
So you have an idea for a chat/communication app that you think can solve a big problem. Or you have a game idea and crave the nostalgia of LAN parties.
Either way you need a way to get a bunch of devices to send and receive messages. Node.js can help with that.
You also need to remember that before you go down the rabbit-hole of designing and building big new features, you should create an MVP — or Minimum Viable Product — to prove that your idea solves the original problem.
They’re are a few things to consider:
- you’re using Node.js, so there will be an Express.js server
- communication is needed, so Socket.io is essential
- you need a machine to act as the host, and as the host it needs to let guests join
- this will only work if your guests are on the same network as your server
Let’s get started and create a basic chat application.
Initial setup
- Run
npm initin a folder to create thepackage.jsonfile. - Install Express.js and Socket.io using
npm install express socket.io. - Create an
index.jsfile. - Make some changes to the
package.jsonfile:
{
  "name": "p2p-app",
  "version": "1.0.0",
  "main": "index.js",
  "scripts": {
    "dev": "node index.js"
  },
  "author": "",
  "license": "ISC",
  "description": "",
  "dependencies": {
    "express": "^4.19.2",
    "socket.io": "^4.7.5"
  },
  "type": "module"
}
The scripts and type are where the changes are. If you run npm run dev it will execute the code in index.js, but right now there’s nothing in there so it won’t do anything. Time to change that.
The server
Right away I’m going to warn you about something: this server will be running on http. It should be running on https, but this is an MVP so we’re not going to worry about that right now. But if you want to take this further then please make this secure.
In your index.js you’ll need to add some code.
import express from "express";
import { createServer } from "node:http";

const app = express();
const server = createServer(app);

const port = 5000;

app.get("/", (req, res) => {
  res.send("Hello World!");
});

server.listen(port, () => {
  console.log(`Server running at http://localhost:${port}`);
});
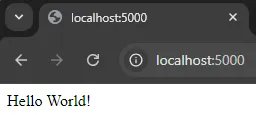
This is the minimum you need to run a server. More will come, but for now you can run npm run dev and see the results on http://localhost:5000.

Great, it’s serving a page. I’m not a fan of keeping raw HTML in the index.js file like that. I’d prefer to have the contents in a separate HTML file.
As you make changes remember to shut-down the server using CTRL+C (or the Mac equivalent). Any changes to index.js won’t take effect while the server is running.
Create a public folder and inside that create an index.html file. You can use this as the content:
<!DOCTYPE html>
<html>
  <head>
    <meta name="viewport" content="width=device-width,initial-scale=1.0" />
    <title>Chat</title>
  </head>
  <body>
    <p>Hello World!</p>
  </body>
</html>
And some changes to index.js:
import express from "express";
import { createServer } from "node:http";
import { fileURLToPath } from "node:url"; // <- new
import { dirname, join } from "node:path"; // <- new

// ...

const __dirname = dirname(fileURLToPath(import.meta.url));

app.get("/", (req, res) => {
  res.sendFile(join(__dirname, "public/index.html"));
});

// Serve static files
app.use(express.static(join(__dirname, "public")));
That’ll work for now. You can now update the public/index.html page whenever you want, keeping the content outside the server.
You might have noticed the additional support for static files using the public folder. You’ll be adding some extra files in a moment, so having this is needed.
Inviting others
Whether it’s for a yourself, a group of volunteers or friends for a LAN party, you’re going to need a way to invite them, or more specifically their devices.
Now you can’t just share the http://localhost:5000 URL to them, because localhost is only for the machine running the server. You need to find your machine’s actual IP address and share it with them.
To make the sharing part easy, run npm install qrcode to install the QRCode library. You’ll be able to use this to store a URL that your guests can use, and you can show it in your browser while you run the server.
Put the following into your index.js file:
import express from "express";
import { createServer } from "node:http";
import { fileURLToPath } from "node:url";
import { dirname, join } from "node:path";
import os from "node:os"; // <- new
import dns from "node:dns";// <- new
import QRCode from "qrcode";// <- new

// ... all new below ...

// Create a random id for the session
const sessionId = Math.random().toString(36).substr(2, 9);

// Get the local IP address
dns.lookup(
  os.hostname(),
  {
    family: 4,
    hints: dns.ADDRCONFIG | dns.V4MAPPED,
  },
  (err, address) => {
    const url = `http://${address}:${port}/${sessionId}`;

    // Generate QR code and save it to a file
    QRCode.toFile(
      join(__dirname, "public/qrcode.png"),
      url,
      {
        width: 300,
        height: 300,
      },
      (err) => {
        if (err) {
          console.error(err);
          return;
        }
        console.log(`Scan the QR code to join the chat: ${url}`);
        console.log(`QR code generated and saved to public/qrcode.png`);
      }
    );
  }
);
This dns.lookup and os.hostname part will return the IP address. The rest of the code will convert the full URL (http protocol + IP address + port number + session/chat) into a QR code image and save it in the public folder.
It will also be kind enough to give you the URL in the console, just in case you need it.
The sessionId is completely optional: it’s a way to make sure that people can’t just rejoin a session if you have to restart the server. It’s a random string that you can use for the chat-part, but if you don’t want/need it you can just replace it with chat for now.
One last change for the index.js:
app.get(`/${sessionId}`, (req, res) => {
  res.sendFile(join(__dirname, "public/chat.html"));
});
This prepares the server to return the actual chat application. If you don’t want to use the sessionId from before you can use:
app.get("/chat", (req, res) => {
  res.sendFile(join(__dirname, "public/chat.html"));
});
Now go into your public/index.html page and add the image:
<body>
  <img src="qrcode.png" alt="QR Code" />
</body>
If you run the server it should generate the QR code image and show it in your browser.
And finally, the chat part
You already installed Socket.io earlier, so time to update the index.js:
import express from "express";
import { createServer } from "node:http";
import { fileURLToPath } from "node:url";
import { dirname, join } from "node:path";
import os from "node:os";
import dns from "node:dns";
import QRCode from "qrcode";
import { Server } from "socket.io"; // <- new

const app = express();
const server = createServer(app);
const io = new Server(server); // <- new

// ...

// Socket.io
io.on("connection", (socket) => {
  socket.on("joined", (nickname) => {
    io.emit("joined", nickname);
  });

  socket.on("message", (data) => {
    io.emit("message", data);
  });
});
Like the Express.js app, the socket listens for events to be emitted from the browser. We’re using two here:
joined: when someone joins from the browser then everyone should know itmessage: when someone send a message then everyone in the chat should receive it
The message part is probably more important, but showing two events means you’re not limited to just one.
Now create a public/chat.html file, and give it a basic structure:
<!DOCTYPE html>
<html>
  <head>
    <meta name="viewport" content="width=device-width,initial-scale=1.0" />
    <title>Chat</title>
    <link rel="stylesheet" href="styles.css" />
    <script src="https://cdn.socket.io/4.7.5/socket.io.min.js"></script>
  </head>
  <body>

  </body>
</html>
I’m going to try and keep the complexity to a minimum. That means the browser-edition of Socket.io will be coming from a CDN and not bundled with any other code.
(If you want to change this to use your favourite library like React, Vue or Svelte that’s completely fine, but at least make sure it works like this first.)
In the body you need to add two “screens”: one for letting your guests give a nickname and another for them to chat:
<section id="join">
  <form id="joinForm" class="form" action="">
    <input
      id="nickname"
      placeholder="Nickname"
      autocomplete="off"
      class="input"
    /><button>Join</button>
  </form>
</section>

<section id="chat">
  <ul id="messages"></ul>
  <form id="chatForm" class="form" action="">
    <input
      id="input"
      placeholder="Today I..."
      class="input"
      autocomplete="off"
    /><button>Send</button>
  </form>
</section>
And now for the rest which is JavaScript for the browser in the public/chat.html file:
<script>
  // Get the screens
  const joinScreen = document.getElementById("join");
  const chatScreen = document.getElementById("chat");

  // Get the join elements
  const joinForm = document.getElementById("joinForm");
  const nicknameInput = document.getElementById("nickname");

  const init = () => {
    chatScreen.style.display = "none";
    joinForm.addEventListener("submit", (evt) => {
      evt.preventDefault();
      if (nicknameInput.value) {
        connect();
      }
    });
  };

  const connect = () => {
    joinScreen.style.display = "none";
    chatScreen.style.display = "block";

    const socket = io();
    const chatForm = document.getElementById("chatForm");
    const input = document.getElementById("input");
    const messages = document.getElementById("messages");

    socket.emit("joined", nicknameInput.value);

    chatForm.addEventListener("submit", (evt) => {
      evt.preventDefault();
      if (input.value) {
        socket.emit("message", {
          from: nicknameInput.value,
          msg: input.value,
        });
        input.value = "";
      }
    });

    socket.on("joined", (nickname) => {
      const item = document.createElement("li");
      item.textContent = `${nickname} has joined the chat`;
      messages.appendChild(item);
    });

    socket.on("message", ({ from, msg }) => {
      const item = document.createElement("li");
      item.textContent = `[${from}]: ${msg}`;
      messages.appendChild(item);
      window.scrollTo(0, document.body.scrollHeight);
    });
  };

  init();
</script>
When the init function is run it hides the chat screen awaits for the guest to enter their name. When the form is submitted it will run the connect function.
The connect function is where the magic happens. It connects to the server with this: const socket = io();
And then emits the joined event, allowing all guests to see they’ve entered the chat.
The chatForm.addEventListener is similar to the contents of the init function and allows guests to type and use the Enter key without having to press the “Send” button. They still can of course, but it’s one of those things that’s noticed when it’s not there.
The socket.on(“joined” and socket.on(“message” also handle events, except these are the ones that update the chat UI.
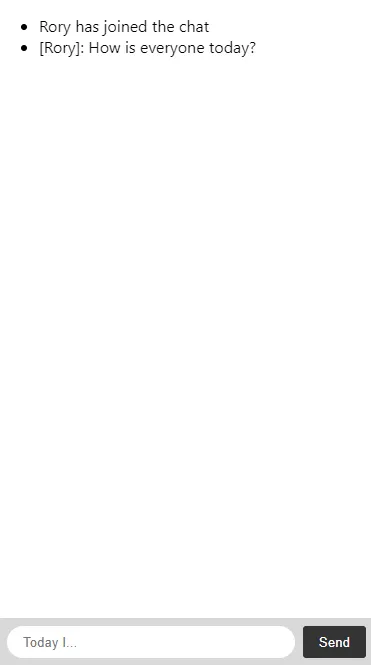
If you run the server locally and then use another device to join (or just copy the URL in the console) you should be able to send and receive messages:

Wrapping up
That’s it for the MVP. You now have an app that enables others to join your chat application.
Now, earlier I said this:
this will only work if your guests are on the same network as your server
If you send the URL or QR code to someone outside your local network then chances are they won’t be able to access the server.
Some people like to see the full repo, so here’s a link:
GitHub - roryhering/p2p-app